Purpose
Steps
-
From the Planes menu, select Tray Ceiling or click
 on the Planes toolbar.
The Tray Ceiling dialog displays.
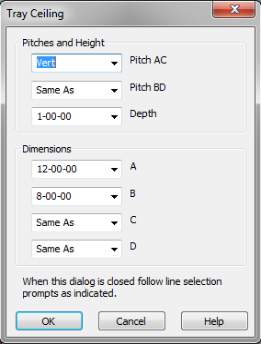
There are several options:
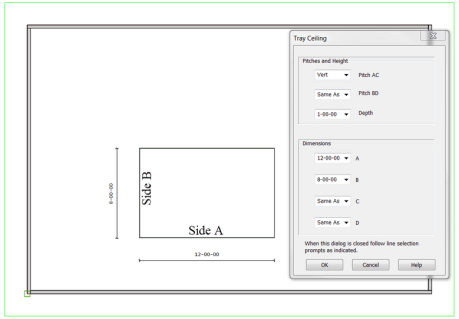
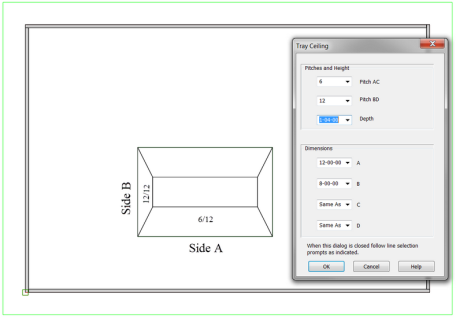
- Pitch AC = the ceiling pitch for sides A and C of the tray (see the examples below for side locations)
- Pitch BD = the ceiling pitch for sides "B" and "D" of the tray (see the examples below for side locations)
- Depth = the vertical height of the tray ceiling; this is the vertical height to the flat section of the tray above the wall height.
- A = the length of the A side (see the examples below for side locations)
- B = the length of the B side (see the examples below for side locations)
- C = the length of the C side (see the examples below for side locations)
- D = the length of the D side (see the examples below for side locations)
- Enter the appropriate information and click OK.
The following prompt displays.

- Select a parallel source line to the A side of the tray ceiling.
The Enter Offset Distance window displays.
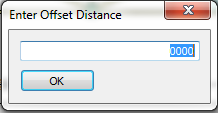
- Enter an offset distance and click OK.
The following prompt displays.

- Click the side of the line to indicate the direction that it should move.
The reference line for the A side of the tray moves in the offset direction and by the offset amount specified in step 4.
The following prompt displays.

- Select a parallel source line to the B side of the tray ceiling.
The Enter Offset Distance window displays.
- Enter an offset distance and click OK.
The following prompt displays.
-
Click the side of the line to indicate the direction that it should move.
The following prompt displays.

- Click to indicate the location of the tray (relative to the corner).
The tray is created at the location specified.
 Note: If you have trays at multiple elevations, define the desired elevations in Settings Dialogprior to input.